Guide for Django (DRF) and React Setup

About this Tutorial
This tutorial is intended for anyone who is new to Django and wants to rapidly build an application before going deep into the workings of Django. Even if you just want to learn Django for the sake of it, it is highly encouraged that you start with some sort of quick start tutorial instead of spending hours watching a tutorial. For React, the same applies as long as you fulfill the pre-requisites below:
Pre-Requisites
There are a bunch of very useful tutorials out there; therefore, I have structured them here in the order in which it will help. Note that you may not want to strictly follow the order given below, For example, you can spend a day on HTML and revisit it while following the Django Tutorial.
HTML and CSS:
The most important pre-requisite for this tutorial is that you have a foundational understanding of the web which includes HTML, CSS, and the way browsers work. It is also very good if you know how to utilize the developer tools that come along with most modern browsers. One of very useful tutorial by Mozilla:
- Mozilla HTML and CSS Tutorial There are two versions on the guide, use the getting started one. Also, you do not need to remember everything; it is okay as long as you have a basic overview.
JavaScript ES6:
Again, you only need to be comfortable with the pieces of JS that are most relevant to building a small-scale web app (JS is very feature-rich as a programming language, for example, JS also supports the OOP paradigm, but all of that is not relevant here). Make sure you are comfortable with the concept of Document Object Model. I will again recommend using the tutorial by Mozilla but there are tons of tutorials to make you comfortable with that. ES6 is sort of a newer version of JS, with some newer features, so you should make sure you are learning from tutorials that are upgraded to ES6. Also, make sure learn-by-doing; apart from enhancing the learning process, it will help you to make comfortable with common bugs that occur in browsers.
Use the developer console to see bugs on the page.
Thinking in React:
React is a very powerful way to write frontends for webpages. The highly reusable components make React one of the most used technologies in the web space. React is based on JSX, a modified version of JS which is not directly supported in browsers. Apart from the implementation details of React, it introduces a new way to think about your app. For React, you will always find a bunch of useful tutorials but I will recommend following a very nice tutorial on the official page:
How to Start a Django Project (without DRF):
Now that you are comfortable with the foundational knowledge and have some idea about how to work with React, you should proceed on to set up a simple Django application. There are a few tutorials that will help you with that
Try going through all of these. Follow one primarily but take a look at others too. The slight differences in these will help you to solidify and deepen your understanding. I personally prefer the Mozilla guide for its best practices approach.
A basic Django tutorial like these will guide you to make a front-end using some called templates. In our case, Django uses the Jinja2 templating language (you can look up more about it yourself). Now although this approach works fine, it is not maintainable for larger projects. This approach is also not optimal for applications that need to be secure and efficient. This is the main reason why we use React as a frontend. Whatever you can do with React, you may well be able to do it with Jinja but it will definitely be very painful to manage such an application (if you are designing an app that may change over time).
DJANGO REST FRAMEWORK
After working your way through the above guides, you are now in a position to look at Django-rest-framework. Although we can definitely start using DRF automatically, it is helpful if you first take a look yourself. Django is an ecosystem and therefore there are multiple approaches, paradigms, patterns to build a project and it is a choice upon you as a developer. For example, you may have incurred upon the fact that Django can have function-based views as well as class-based views. You can also simplify tasks like building forms using ModelForm class that maps Models to Forms directly. Therefore, it is important to look at a few sources and guides for DRF in advance:
This is the guide for a quick application with DRF; however, it may not be easy to digest. Therefore, I will suggest looking up a few other tutorials simultaneously and try to grasp the concept of doing CRUD operations with DRF.
This page is under construction
REACT
First initiate an nodejs project with the below commands
1
npm init -y
Django app with DRF
Note that this tutorial is with linux environment. If you are using Windows, it is likely that the command for python 3.xx will be
pythoninstead ofpython3and the command for pip will bepipinstead ofpip3.
Be sure to update the package list and upgrade the system by running the following command:
Install Python and pip
You can install Python and pip by running the following command:
1
2
sudo apt-get install python3
sudo apt-get install python3-pip
Create a virtual environment
If you are using linux, you may need to install the
venvmodule by running the following command:
Virtual environments are a way to create isolated Python environments, each with its own set of packages. This is useful for isolating your project’s dependencies. In order to create a virtual environment, you can use the following command:
1
python3 -m venv source_env
The
source_envis the name of the virtual environment. You can use any name you want.
After creating the virtual environment, you need to activate it. You can do this by running the following command:
1
source server_env/bin/activate
After you are done with the virtual environment, you can deactivate it by running the following command:
1
deactivate
Make sure that you are in the virtual environment before installing any packages. You can check this by looking at the command prompt. If you see the name of the virtual environment in the command prompt, then you are in the virtual environment.
Install Django and Django REST Framework
Before installing Django, make sure that you are in the virtual environment. You can check this by looking at the command prompt. If you see the name of the virtual environment in the command prompt, then you are in the virtual environment.

You can install Django by running the following command:
1
2
pip3 install django
pip3 install djangorestframework
If you have a requirements.txt file, you can install all the packages listed in the file by running the following command:
In order to freeze the installed packages, you can run the following command:
pip3 freeze > requirements.txt
Create a new Django project
You can create a new Django project by running the following command:
1
django-admin startproject server
Your directory structure should look like this:
1
2
3
4
5
6
7
8
9
10
11
12
13
14
root/
├── server/
│   ├── server/
│   │   ├── __init__.py
│   │   ├── settings.py
│   │   ├── urls.py
│   │   └── wsgi.py
│   └── manage.py
└── source_env/
    ├── bin/
    ├── include/
    ├── lib/
    └── pyvenv.cfg
Change the directory to the newly created project by running the following command:
1
cd server
You can create a new Django app by running the following command:
1
python3 manage.py startapp ats
Now your directory structure should look like this:
1
2
3
4
5
6
7
8
9
10
11
12
13
14
15
16
17
18
19
20
21
root/
├── server/
│   ├── ats/
│   │   ├── migrations/
│   │   ├── __init__.py
│   │   ├── admin.py
│   │   ├── apps.py
│   │   ├── models.py
│   │   ├── tests.py
│   │   └── views.py
│   ├── server/
│   │   ├── __init__.py
│   │   ├── settings.py
│   │   ├── urls.py
│   │   └── wsgi.py
│   └── manage.py
└── source_env/
    ├── bin/
    ├── include/
    ├── lib/
    └── pyvenv.cfg
Note the
atsdirectory and theserverdirectory. Theatsdirectory is the app that you just created, and theserverdirectory is responsible for the project settings. For a simple project, this structure is the default one, but it is not necessary to follow this structure. You can change the structure according to your needs as your project grows.
Run the server
First you need to migrate the database by running the following command:
1
2
python3 manage.py makemigrations # This will create the migrations for the app
python3 manage.py migrate # This will apply the migrations to the database
We will not go into the details of migrations in this tutorial. You can read more about migrations in the official Django documentation.
Run the server by running the following command:
1
python3 manage.py runserver --port 8000
You can access the server by going to the following URL in your web browser:
1
http://localhost:8000
You should see the following page: 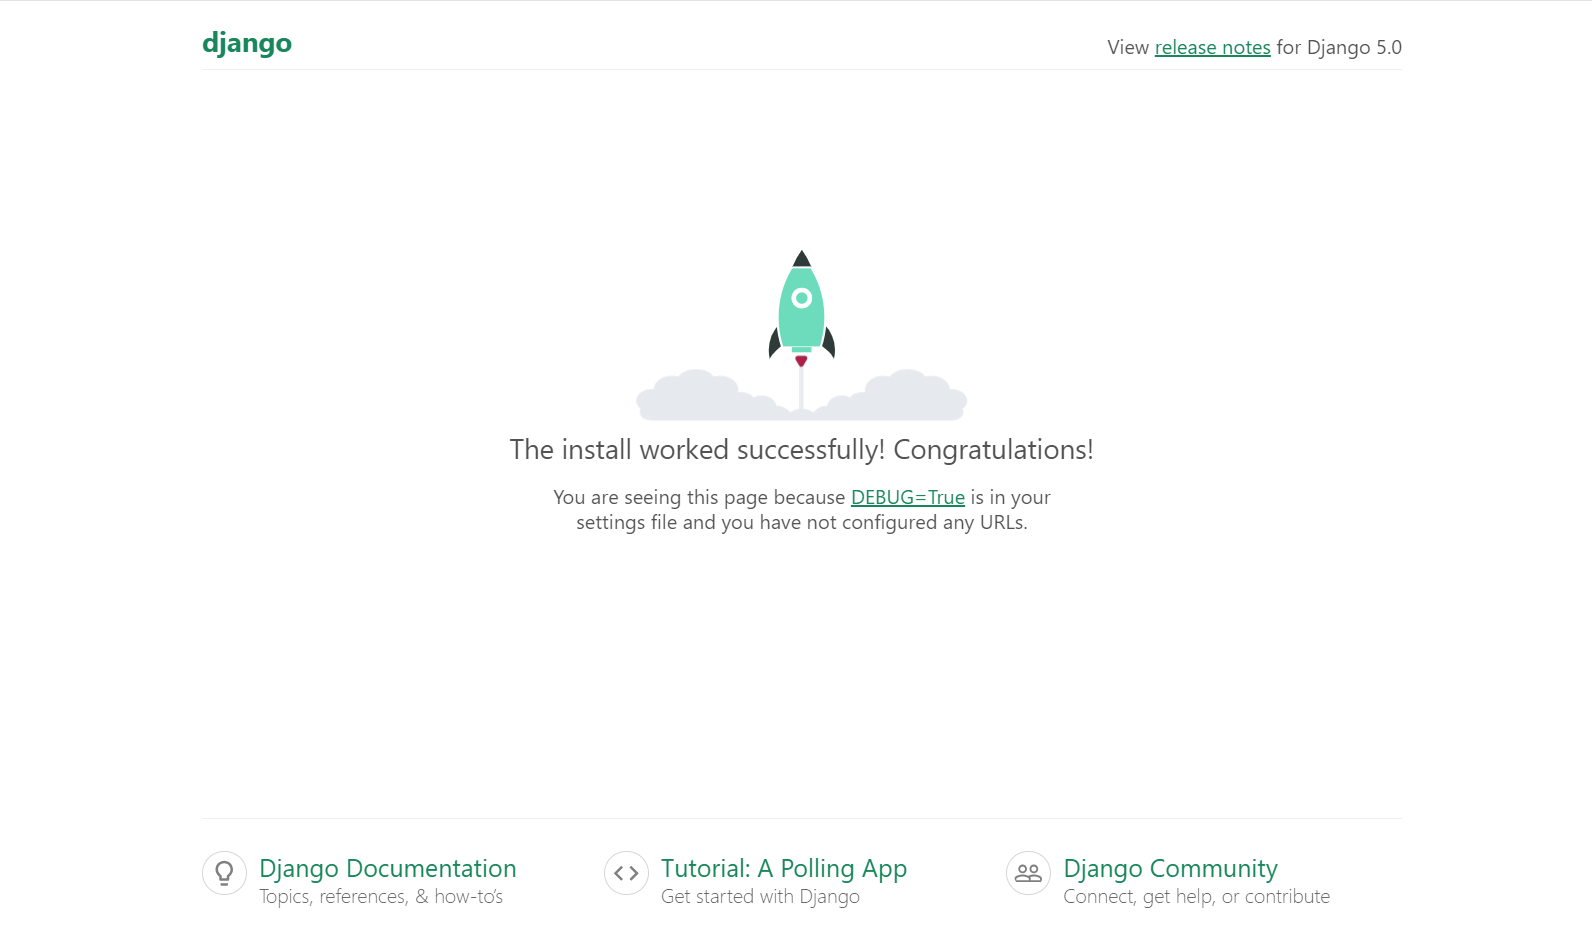
Configuring the settings and DRF
Append the code to the files as shown below in order to configure the settings and Django REST Framework’s API view.
1
2
3
4
5
6
7
INSTALLED_APPS += [
    'rest_framework',
]

INSTALLED_APPS += [
    'ats'
]
1
2
3
4
5
from django.urls import include

urlpatterns += [
    path('', include('ats.urls')),
]
Create a new file named urls.py in the ats directory and add the following code to the file:
1
2
3
4
5
6
7
8
9
10
from django.urls import path, include
from rest_framework import routers

import ats.views as ats_views

router = routers.DefaultRouter()

urlpatterns = [
    path('', include(router.urls)),
]
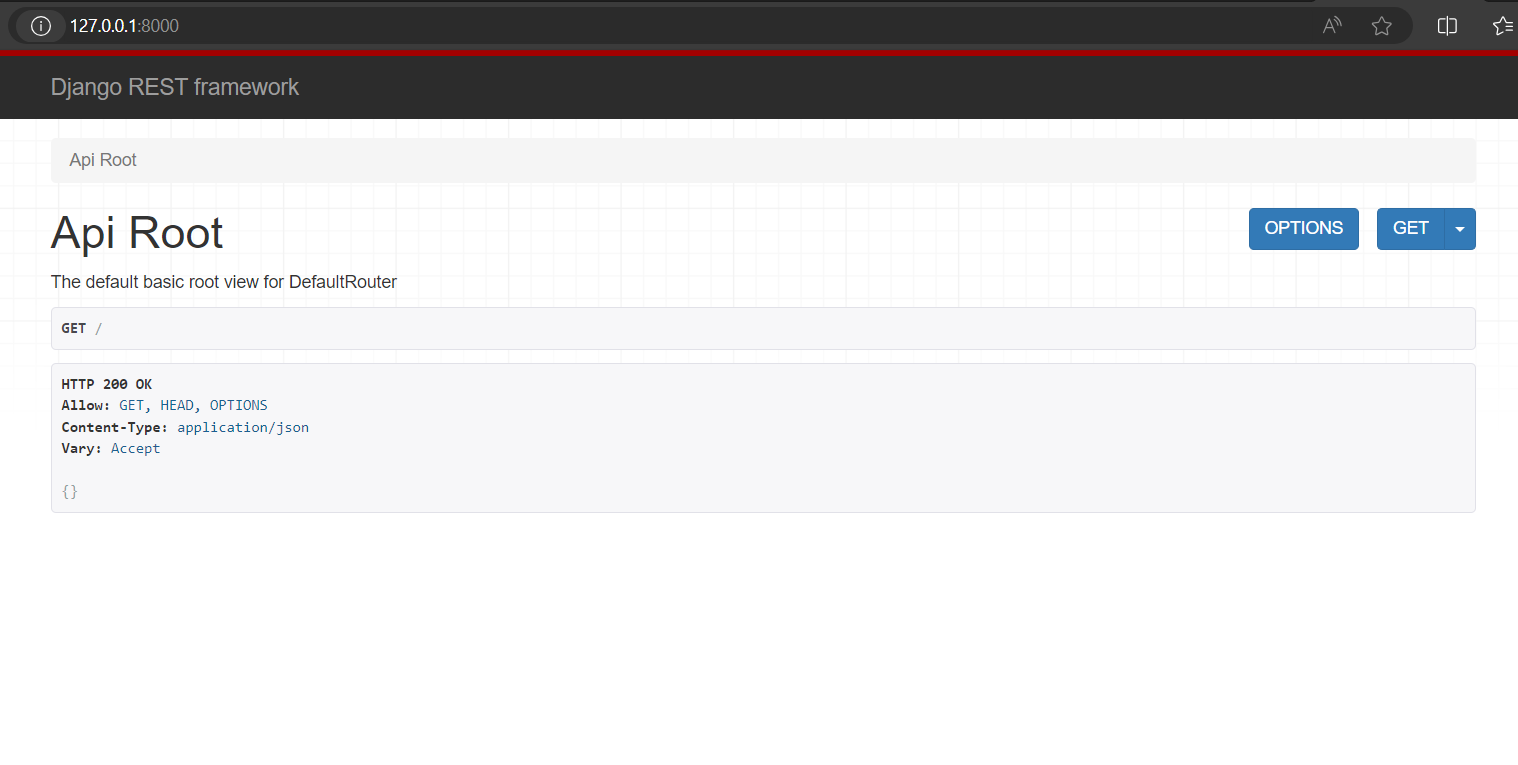
Refresh the page https://localhost:8000 (you may need to rerun the server) and you should see the following page:
Note that the page is not very informative. This is because we have not yet created any views. We will create the views in the next section. This is a GUI that comes out of the box with DRF. It is very useful for testing the API. It should not be used in production.